Valentin Gasenko MCT | MCP | Senior Power Platform Developer
I decided to write this article, which will consist of two parts because there’s not much information on the subject. The information available at learn.microsoft should seem to be enough, but it’s not enough, because when you start to work with this functionality, you realize that there are a lot of pitfalls that you haven’t been warned about.
My job is to warn you about them.
So, today I want to talk about Rich Text Editor (RTE) for PowerApps, especially using this great PCF control for PowerPages (Portals).
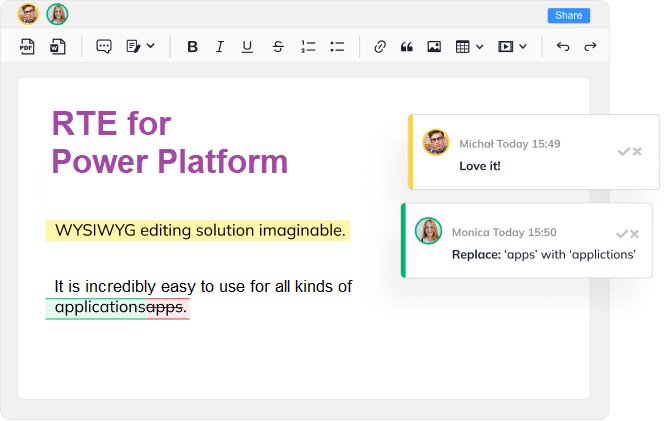
RTE – it’s a control that turns your ordinary and boring field into a component that you can style, add pictures, a table, colorful text, etc. to that field.
RTE provides the application user with a WYSIWYG editing area for text formatting. The input and output format of the control is HTML. The control allows you to paste the copied text into it, for example from a web browser or Word, which is extremely convenient and practical.
Some of the format options:
- Bold, italic, underline, and strikethrough
- Text color, highlight color
- Font type and size
- Numbered lists and bulleted lists
- Hyperlinks
- Tables
- Images
So, let’s say we have a portal and we want to see this field on one of its pages. What do we need to do?
Step 1. Add the RTE to a column in a model-driven app
As for adding this component for Model-Driven apps, the Microsoft site is pretty well described. Start there, and then come back to my article, because we need to look at using this component on the PowerPages side.
Very briefly, through the customization window of the model-driven app create a new text column and configure the control (apply component PCF RTE), or replace an existing text column. RTE control can be used with single or multi-line text columns. This is enough at first.
Step 2. Verify that the model-driven app uses the new control
You can update an existing model-driven app or create a new app with the form to which you added the component. For example, the following image shows the feedback table simple contact us form using the RTE control in a model-driven app:

Step 3. Add an RTE control to a basic form in portals
In this step, you’ll create a new basic form in portals and then add the control to the basic form. You can also use an existing basic form.
Step 3.1. Create a new basic form
- Open the Portal Management App.
- On the left pane under Content, select Basic Forms.
- Select New.
- Enter a Name for the form. In this example, I am using a Feedback basic form with RTE.
- For Table Name, select Feedback (feedback).
- Select the name of the model-driven app form to which you added an RTE control. In this example, simply contact us form.
- Select your portal website.

8. Select Save & Close.
Step 3.2. Add an RTE control to the basic form
- Open the Portal Management App.
- On the left pane under Content, select Basic Forms.
- Select the basic form you created in step 3.1.
- Select the Basic Form Metadata tab.
- Select New Basic Form Metadata.
- For Type, select Attribute.
- For the Attribute Logical Name, select the name of the column for which an RTE control is enabled. In this example, Comments (comments).

8. Enter a value for Label. In this example, Comments.
9. For Control Style, select Code component.

10. Select Save & Close.
Step 3.3. Add table permissions for the RTE attachment table
For using and storing images in RTE on the portal, you’ll need to add table permissions to the RTE attachment table (msdyn_richtextfile).
- Open your portal in portals Studio.
- On the left pane, choose Settings (gear icon) and select Table Permissions

3. Create a new table permission for the RTE attachment table. The name can be anything you choose; in this example, I’m using RTE Attachment (I’m not very original in my choice of names, sorry).
4. For Access type, select Global access.
The Global access type is chosen because no relationship exists between the table configured to use RTE control and RTE attachment table. In fact, this is a huge problem, which will be discussed in more detail in the next article (Part 2)
5. Under Permission to, select the Read, Write, Create, and Delete checkboxes.
6. Assign an appropriate web role to the table permission.

If you want to store images as base64 string directly in the column that you have configured to use an RTE control, you must configure the control with the JSON configuration file. Each of the suggested options has its own pitfalls; we’ll look at them in more detail in my next article.
Step 3.4. Add web API site setting
- Open the Portal Management app.
- Go to Site Settings.
- Create the following site settings: enter the name, your website, and the value of true, and then select Save & Close.

Step 4. Create a webpage in portals that uses the basic form
- Open your portal in the Power Apps portals Studio.
- In the upper-left corner, select New page.
- Select the Blank layout.
- On the right-side property pane, update the webpage name. For example, Feedback.
- Update the Partial URL. For example, feedback.
- Inside the page editor, below the Header section, select the Column section.
- On the left pane, select Components (+).
- Under Portal components, select Form.
- On the right-side property pane, select Use existing.
- Under Name, select the basic form that you created earlier in this tutorial. In this example, Feedback basic form with RTE.
- Under Permissions, select Manage table permissions and make sure that you have the appropriate table permissions and web roles configured for the Dataverse table associated with the form.
- In the upper-right corner, select Browse website.
The webpage will now show the basic form for the feedback table with RTE control, similar to how the form appears while the model-driven app is being used.
Try adding tables, pictures, and text in different styles. It’s great, isn’t it?

So, we briefly looked at how you can apply RTE control to fields on portal pages. It would seem that everything is good, everything is beautiful, and there is no reason to be sad, but, unfortunately, this is only one – the bright side of the coin. I will tell you about the disadvantages of this field, about problems with storing data in it, and about security issues in the second part of this article.
Thank you for your attention and have a nice development! See ya